The saying “well begun is half done” really applies to residential interior painting. I run Pro Painters in Salt Lake City. I’ve learned that to get a perfect finish, you need to start right. I’ve become great at home paint preparation. This means making sure your walls are ready for a beautiful change.
Being on a ladder, sander in hand, is something I know well. Every inch of your space must be ready. This makes us not just professional painters, but true artists. We care about transforming homes with precision.
Key Takeaways
- The cornerstone of a great paint job is thorough surface preparation.
- Cleaning, scraping, sanding, and repairing are crucial for optimal paint adhesion.
- Professional painters like myself are dedicated to meticulous preparation.
- Caulking and priming are pivotal steps for a long-lasting and even finish.
- Proper preparation enhances both the aesthetics and longevity of your interior paint job.
The Critical Role of Surface Preparation
In the world of professional painting, surface preparation is key. At Pro Painters, we start every job focusing on this stage. This makes sure the paint adhesion is strong. It also ensures the paint job lasts through tough weather and time.
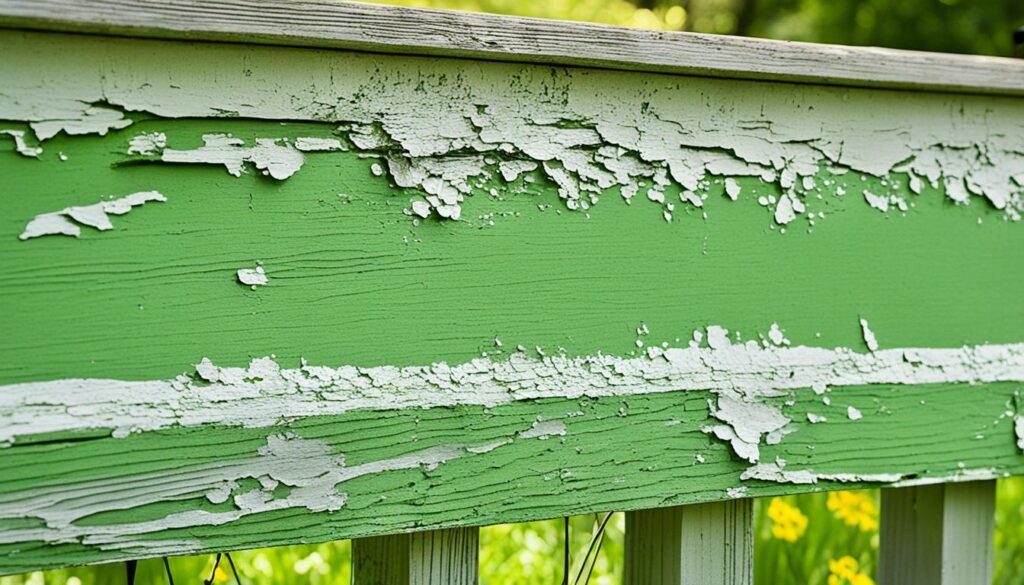
My team and I have a set way of preparing surfaces. First, we make sure the surface is clean. We remove dirt, mold, and any peeling paint. This helps the new paint stick better and last longer.
Next, we fix any surface flaws. We scrape and sand to make the base smooth. This is critical for paint adhesion. Then, we repair any cracks or holes and fill gaps. This helps save energy and makes the paint last longer.
The last step in our prep work is applying a quality primer. This makes sure the paint sticks well. It helps the paint job look great and last a long time.
| Step | Description | Objective |
|---|---|---|
| Cleaning | Remove dirt, mold, flaking paint | Clear surface for pristine paint adhesion |
| Scraping & Sanding | Even out the surface | Prepare smooth base for painting |
| Repair & Caulking | Fix damages and seal gaps | Enhance durability and energy efficiency |
| Priming | Apply quality primer | Ensure uniform adhesion and coverage |
By focusing on surface preparation, Pro Painters aims to make your property look good. But we also ensure it stays strong and beautiful for years. It’s more than just a paint job; it’s about giving your property a durable shake.
Choosing the Best Time for Exterior Painting
As a professional painter, I know how important painting time is. Optimal painting conditions make a perfect finish possible. In this guide, I’ll talk about why choosing the right moment is key for exterior paint adhesion.
The best time for painting outside is when it’s not too hot or cold. Specifically, between 50 and 80 degrees Fahrenheit. This range helps paint dry evenly. It avoids the issues that come with very hot or cool conditions.
- Check the weather forecast to choose a dry period with little to no chance of rain.
- Avoid painting in direct sunlight or during windy conditions to prevent imperfections.
Making sure painting happens under these optimal conditions can make or break your project. So, painting during the dry season is very important.
Painting during moderate temperatures makes drying times better. It also means a long-lasting and high-quality finish.
In the end, remember that the timing is as important as the quality of paint and how you paint. Time your project right under optimal conditions for the best exterior paint adhesion. Good planning leads to great results that last.
Cleaning and Clearing the Way for Pro Painters
Starting an exterior paint project means doing great professional painting preparation. This is key for a lasting and good-looking finish. First, we do an home exterior cleaning to make the surface ready for paint. I’ll show you how my team at Pro Painters makes this happen.
First up, we remove any dirt, mold, or old paint. We might pressure wash or hand scrub with a gentle cleaner. This step makes the paint stick better and last longer. It stops the paint from peeling or cracking too soon.
Then, we clean up the area around the work space. Things like decluttering rooms and protecting fragile items come into play. We care for wall hangings, curtains, and blinds. This protects them from paint drops or damage. It also lets us move around easily and speeds up the job.
Cleaning isn’t just a one-time task for us at Pro Painters. We keep the area clean the whole time. Doing this stops dust and debris from ruining the paint. So, cleaning after we’re done is also very important for us.
The table below shows important steps in professional painting preparation and home exterior cleaning. It explains how each step helps get a perfect finish:
| Preparation Steps | Importance | Tools Used |
|---|---|---|
| Pressure Washing | Removes old paint, dirt, and mildew to ensure paint adherence. | High-pressure washer |
| Decluttering and Securing | Prevents damage to property and allows free movement. | Storage boxes, protective covers |
| Continuous Cleanup | Maintains a clean environment to prevent defects in paint layers. | Brooms, dustpans, vacuum cleaners |
Great home exterior cleaning and careful prep are a must for Pro Painters. This helps us deliver a job that’s not only stunning but also durable. Following these steps, we make sure every brush stroke adds to a great and lasting finish.
Assessing and Repairing Surface Imperfections
As a professional painter, I know exterior paint preparation is crucial for a perfect finish. The right surface repair greatly impacts the overall paint job quality.
Before painting, we must carefully check the home’s exterior. We fix any damage like cracked siding or peeling trim right away. These flaws not only look bad, but they can also harm the painting surface’s structure.

- Filling gaps and patching holes create a smooth painting surface.
- We replace any parts that could get worse under new paint.
- Priming spots ensures the paint sticks well and looks consistent.
We fix these issues for looks and to make the paint last longer. This attention to detail is what makes us pros. We aim for a finish that’s both durable and beautiful.
| Common Imperfection | Repair Technique | Impact on Paint Job |
|---|---|---|
| Cracked Siding | Replacement or filling | Ensures structural integrity and surface uniformity |
| Peeling Trim | Sanding and repainting | Enhances visual appeal and adhesion quality |
| Stained Spots | Priming | Prevents bleed-through, improves color consistency |
In conclusion, good surface repair and prep are key for top-notch home painting. They help make each coat of paint a long-term improvement.
Residential Interior Painting Primer: The Key to Color Consistency
When I start painting inside, I think about the bright colors for the walls. I also make sure the finish is smooth and even. Using a top-notch primer is key for a good start. It helps when changing colors dramatically. It makes sure the new paint looks great.
Priming does more than one might think. It seals the walls, making a smooth surface for paint. It covers stains and stops rust from nail heads. A strong primer stops problems like bleed-through or color changes. These can happen if you skip priming.
At Pro Painters, we choose the best primers for your walls. This careful step helps us keep our promise. We promise to make your room look great and last long. With the right primer, we make sure your painting project is perfect.
FAQ
What steps should I take to prepare my home for residential interior painting?
Start by decluttering each room before painting. Remove wall hangings, curtains, and blinds. Protect furniture with cloths or move it to the room’s center.
Clean the walls well to take off dirt or grime. Fix any holes or cracks. This helps painters do their best.
Why is surface preparation so important before painting my home?
Proper prep is key for paint to last. Without it, paint may peel or flake early. Cleaning, scraping, and fixing damage help.
Applying primer makes sure paint sticks well. It leads to a smooth and durable finish.
How do I choose the best time for exterior painting to ensure the best quality finish?
Paint outside when it’s 50 to 80 degrees with low humidity. This weather helps paint dry right. Avoid extreme temperatures that harm the finish.
What kind of cleaning should be done before painting the exterior of my home?
Clean well before exterior painting. Pressure or hand wash with gentle soap. This removes dirt and mold and helps paint stick.
Clear away debris. Protect plants to keep the work area clean and safe.
How does Pro Painters address surface imperfections before painting?
At Pro Painters, we fix imperfections first. We replace damaged siding or trim and fill gaps. Stains or bare spots get primed.
We consider safety and the environment, dealing with lead paint and mold carefully.
Can you explain the priming process and its benefits for residential interior painting?
Priming is crucial. It seals the surface for even texture and better paint adhesion. It’s applied before the paint.
A stain-blocking primer stops colors or stains from showing through. This means even color and coverage in the end.


